Creating Advanced Searches
Advanced Searches are the most powerful and flexible method for returning specific information from your CRM database. They allow you to quickly see exactly what you’re looking for and also form the foundation of reports created in the Report Assistant.
- Click the Search Bar.
- Click from the drop-down menu.
- Click in the upper-left of the new window.
- Specify which area of AE CRM you want to search in.
- Create your search criteria.
- Select fields you want to search by from the left. You will be prompted to enter your criteria for that field.
- You may specify more than one criteria for any field chosen. Be sure to set your logical operator (AND, OR, NOT) correctly.
- If you select more than one field be sure to set your overall logical operator (AND, OR) correctly.
- Choose how to use this search:
- Click to view your search results.
- Click to save this search definition for later use before viewing the results. Advanced Searches used with the Report Assistant must be saved before use.

Note that when searching extended text fields, the search will only look at the first 500 characters of the field for a match.
Advanced Search Examples
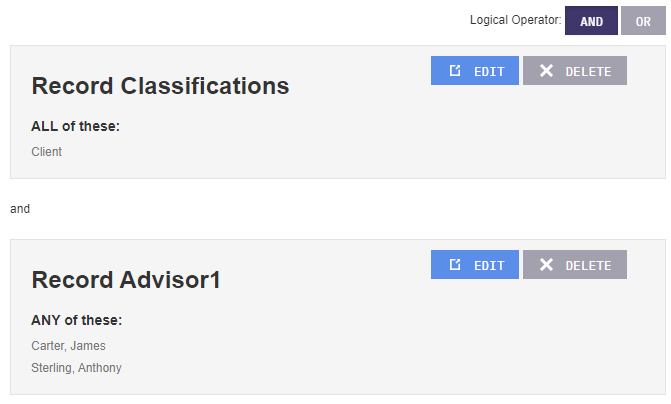
See all clients belonging to two or more particular Advisors
- Create a new Record Advanced Search.
- Select the field.
- Select Client from the left list (either double-click or use the button).
- Click .
- Select the field.
- Select two or more Advisors from the left list.
- Set the to .
- Click .
- Set the for the entire search to .
- Save or use the definition as needed.

See all incomplete Actions for your entire firm.
- Create a new Action Advanced Search.
- Select the field.
- Select Action Required from the drop-down.
- Select .
- Click .
- Select Complete from the drop-down.
- Leave unchecked.
- Set the to .
- Click .
- Click .
- Save or use the definition as needed.

Tip: Add another criteria of Assigned To and set the overall to in order to see incomplete Actions for one particular User.
Related Articles
Using and Managing Advanced Searches
Applying a Saved Advanced Search Click the Search Bar. Click Advanced Search from the drop-down menu. Select the Advanced Search to apply from the list. Click Apply. Editing Saved Advanced Searches Click the Search Bar. Click Advanced Search from the ...Creating Mass Letters
Selecting Recipients and Launching the Correspondence Editor Navigate to the Records Workspace. Use the row checkboxes to select the Records you wish to communicate with. You can use Grid Features and Searches to create a recipient list, combined ...New User Module 2-3: Grids and Searching
Grid Navigation Learn all the flips and switches in a Grid to help you refine the view of your data. Navigating Grids Grid Tools Learn about the various tools in a Grid that let you control what data you see. Grids Overview Sorting Grids Filtering ...Searching Overview
Any Grid in AdvisorEngine CRM with a Search Bar in the upper right corner may be searched to refine the view of data. Different search options are available depending on the Grid you begin searching from. Basic Search Basic Searches are performed by ...Creating Single Letters
Launching the Correspondence Editor You can begin drafting an individual letter from multiple areas of AdvisorEngine CRM. Options include: Select a single Record from the Record Workspace. From the toolbar, choose Document > Letter. From within a ...