Editing Actions
To edit the contents of an Action or make changes to its status, you must first open the Action in the Actions Overview screen. From there, click Edit  on the particular Action to switch the Action Card into edit mode. Only one Action Card may be in edit mode at a time.
Standard vs Detailed View
The controls showing may also vary based on the view selected from the right side tabs: Standard or Detailed.
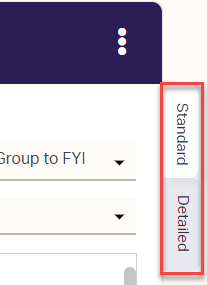
- The Standard tab will show only those controls configured by your firm Administrator in Firm Preferences.
- The Detailed tab will show all controls regardless.
Edit Mode Controls
Below is a description of the various controls available in edit mode. For a description of the fields that can be filled in when editing an Action, see Action Fields Overview.
Create New Item Controls
The More menu  in the upper-right of the edit view allow you to quickly create the respective item and link it automatically to the Action you’re working in. The following options are available:
- Send Email: Create and send an email to the Record. See Sending Emails from Actions for more details.
- Create Document: Create a new document for the Record. See Creating a Document from an Action for more details.
- Calendar: Create a calendar appointment regarding this Action. See Creating an Appointment from an Action for more details.
Expand/Collapse 

Use this toggle control to collapse the Action Card down to the header only, allowing you to view the contents of the remaining Actions in the Workflow easily. Click again to toggle back to expanded view.
View or Add Linked Items

The links along the top of the Notes box can be used to quickly access or add any linked items to the Action. See Linking Items to Actions for more information.
Text Format Controls

Standard text controls to format the contents of the Action notes. Click the  at the bottom of the text controls to hide or show the controls as needed.
Expand/Collapse Notes 

The Notes box may be expanded horizontally to cover the entire Action Card. Click the arrow on the divider bar to expand to full view. Click again to restore the view of the additional fields.
Save, Save and Complete Parent, and Cancel
Use the controls along the bottom of the Action Card to either save your changes or cancel any edits you made. Either will return the Action Card to read view. For use of , see Completing Actions for more information.
The Notes field will auto-save after 10 seconds if left idle while editing. To undo the auto-save and revert all changes to the Action, click .